STEP 1 - INSTALL SOLR
Copy the powershell script from the below link
https://gist.github.com/jermdavis/8d8a79f680505f1074153f02f70b9105
and save it as Install-Solr.ps1
Create a folder for solr as c:\solr
Update the following variables in the script:
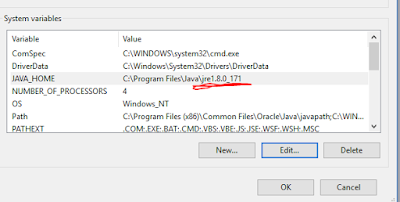
The $JREVersion variable – this should be the same as your Java version
The $JREPath – this should be the path to your Java version
Open powershell with admin permissions and run the following command
Set-ExecutionPolicy RemoteSigned
Then run the script Install-Solr.ps1
STEP 2 - CREATE KEYSTORE
Change the path to the executable based on the path of your JRE installation
“C:\Program Files\Java\jre-9.0.1\bin\keytool.exe” -genkeypair -alias solr-ssl -keyalg RSA -keysize 2048 -keypass secret -storepass secret -validity 9999 -keystore solr-ssl.keystore.jks -ext SAN=DNS:localhost,IP:127.0.0.1 -dname “CN=localhost, OU=Organizational Unit, O=Organization, L=Location, ST=State, C=Country”

After running the above command, a keystore file called solr-ssl.keystore.jks will be created in the current directory.
Run the following in command prompt with administrative privileges.
Change the path of jre before running the command
“C:\Program Files\Java\jre-9.0.1\bin\keytool.exe” -importkeystore -srckeystore solr-ssl.keystore.jks -destkeystore solr-ssl.keystore.p12 -srcstoretype jks -deststoretype pkcs12
This will ask for a password. Enter the password as secret
This will generate a certificate called solr-ssl.keystore.p12 in the current directory
STEP 4 - INSTALL CERTIFICATE
Double click on the generated solr-ssl.keystore.p12 file and follow the wizard to import the certificate. When you reach the Certificate Store window, make sure to place the certificate in the Trusted Root Certification Authorities.
STEP 5 - MOVE KEYSTORE AND CERTIFICATE TO SOLR
Move the generated certificate and keystore files (solr-ssl.keystore.jks, solr-ssl.keystore.p12) to C:\solr\solr-6.6.2\server\etc\
STEP 6 - ENABLE SSL IN SOLR
Edit the file C:\solr\solr-6.6.2\bin\solr.in.cmd
Uncomment properties starting with Solr_SSL_*
STEP 7 - TEST START SOLR
To start solr, run the following in command prompt with administrative privileges
C:\solr\solr-6.6.2\bin\solr.in.cmd -p 8984
Once successfully started up, you should be able to navigate to https://localhost:8984 to make sure that the instance is running.
If no errors are encountered and Solr started successfully, stop Solr by running the command:
C:\solr\solr-6.6.2\bin\solr.in.cmd stop -all
STEP 8 - SET UP SOLR TO RUN AS A WINDOW SERVICE
Run the following in command prompt with administrative privileges.
“C:\solr\nssm-2.24\win64\nssm.exe” install SOLR6
In the insatller window, Set the path to ‘C:\solr\solr-6.6.2\bin\solr.cmd’ ,startup directory to ‘C:\solr\solr-6.6.2\bin’, and Arguments to ‘start -f -p 8983’.
Enter the service name as SOLR, then click Install Service.
Navigate to https://localhost:8983 to make sure Solr is running.


